Raceline Ryno Beadlock Install
 By @ridinlj
- Share
The beadlock wheel gets its name because at least one bead from the tire is being pinched together to prevent it from moving or becoming unbeaded. The first use of this type of wheel goes back to the military Dodge trucks that used a split-wheel design. There have been a few designs over the years, whether designed for off-roading or drag racing. But today, we will explore Raceline Wheels and why I keep returning.
Raceline Wheels was founded in 1996 to be the leader in building off-road wheels. Since then, they have developed and expanded not just into the off-road world or off-road racing but into truck, passenger, and even trailer wheels.
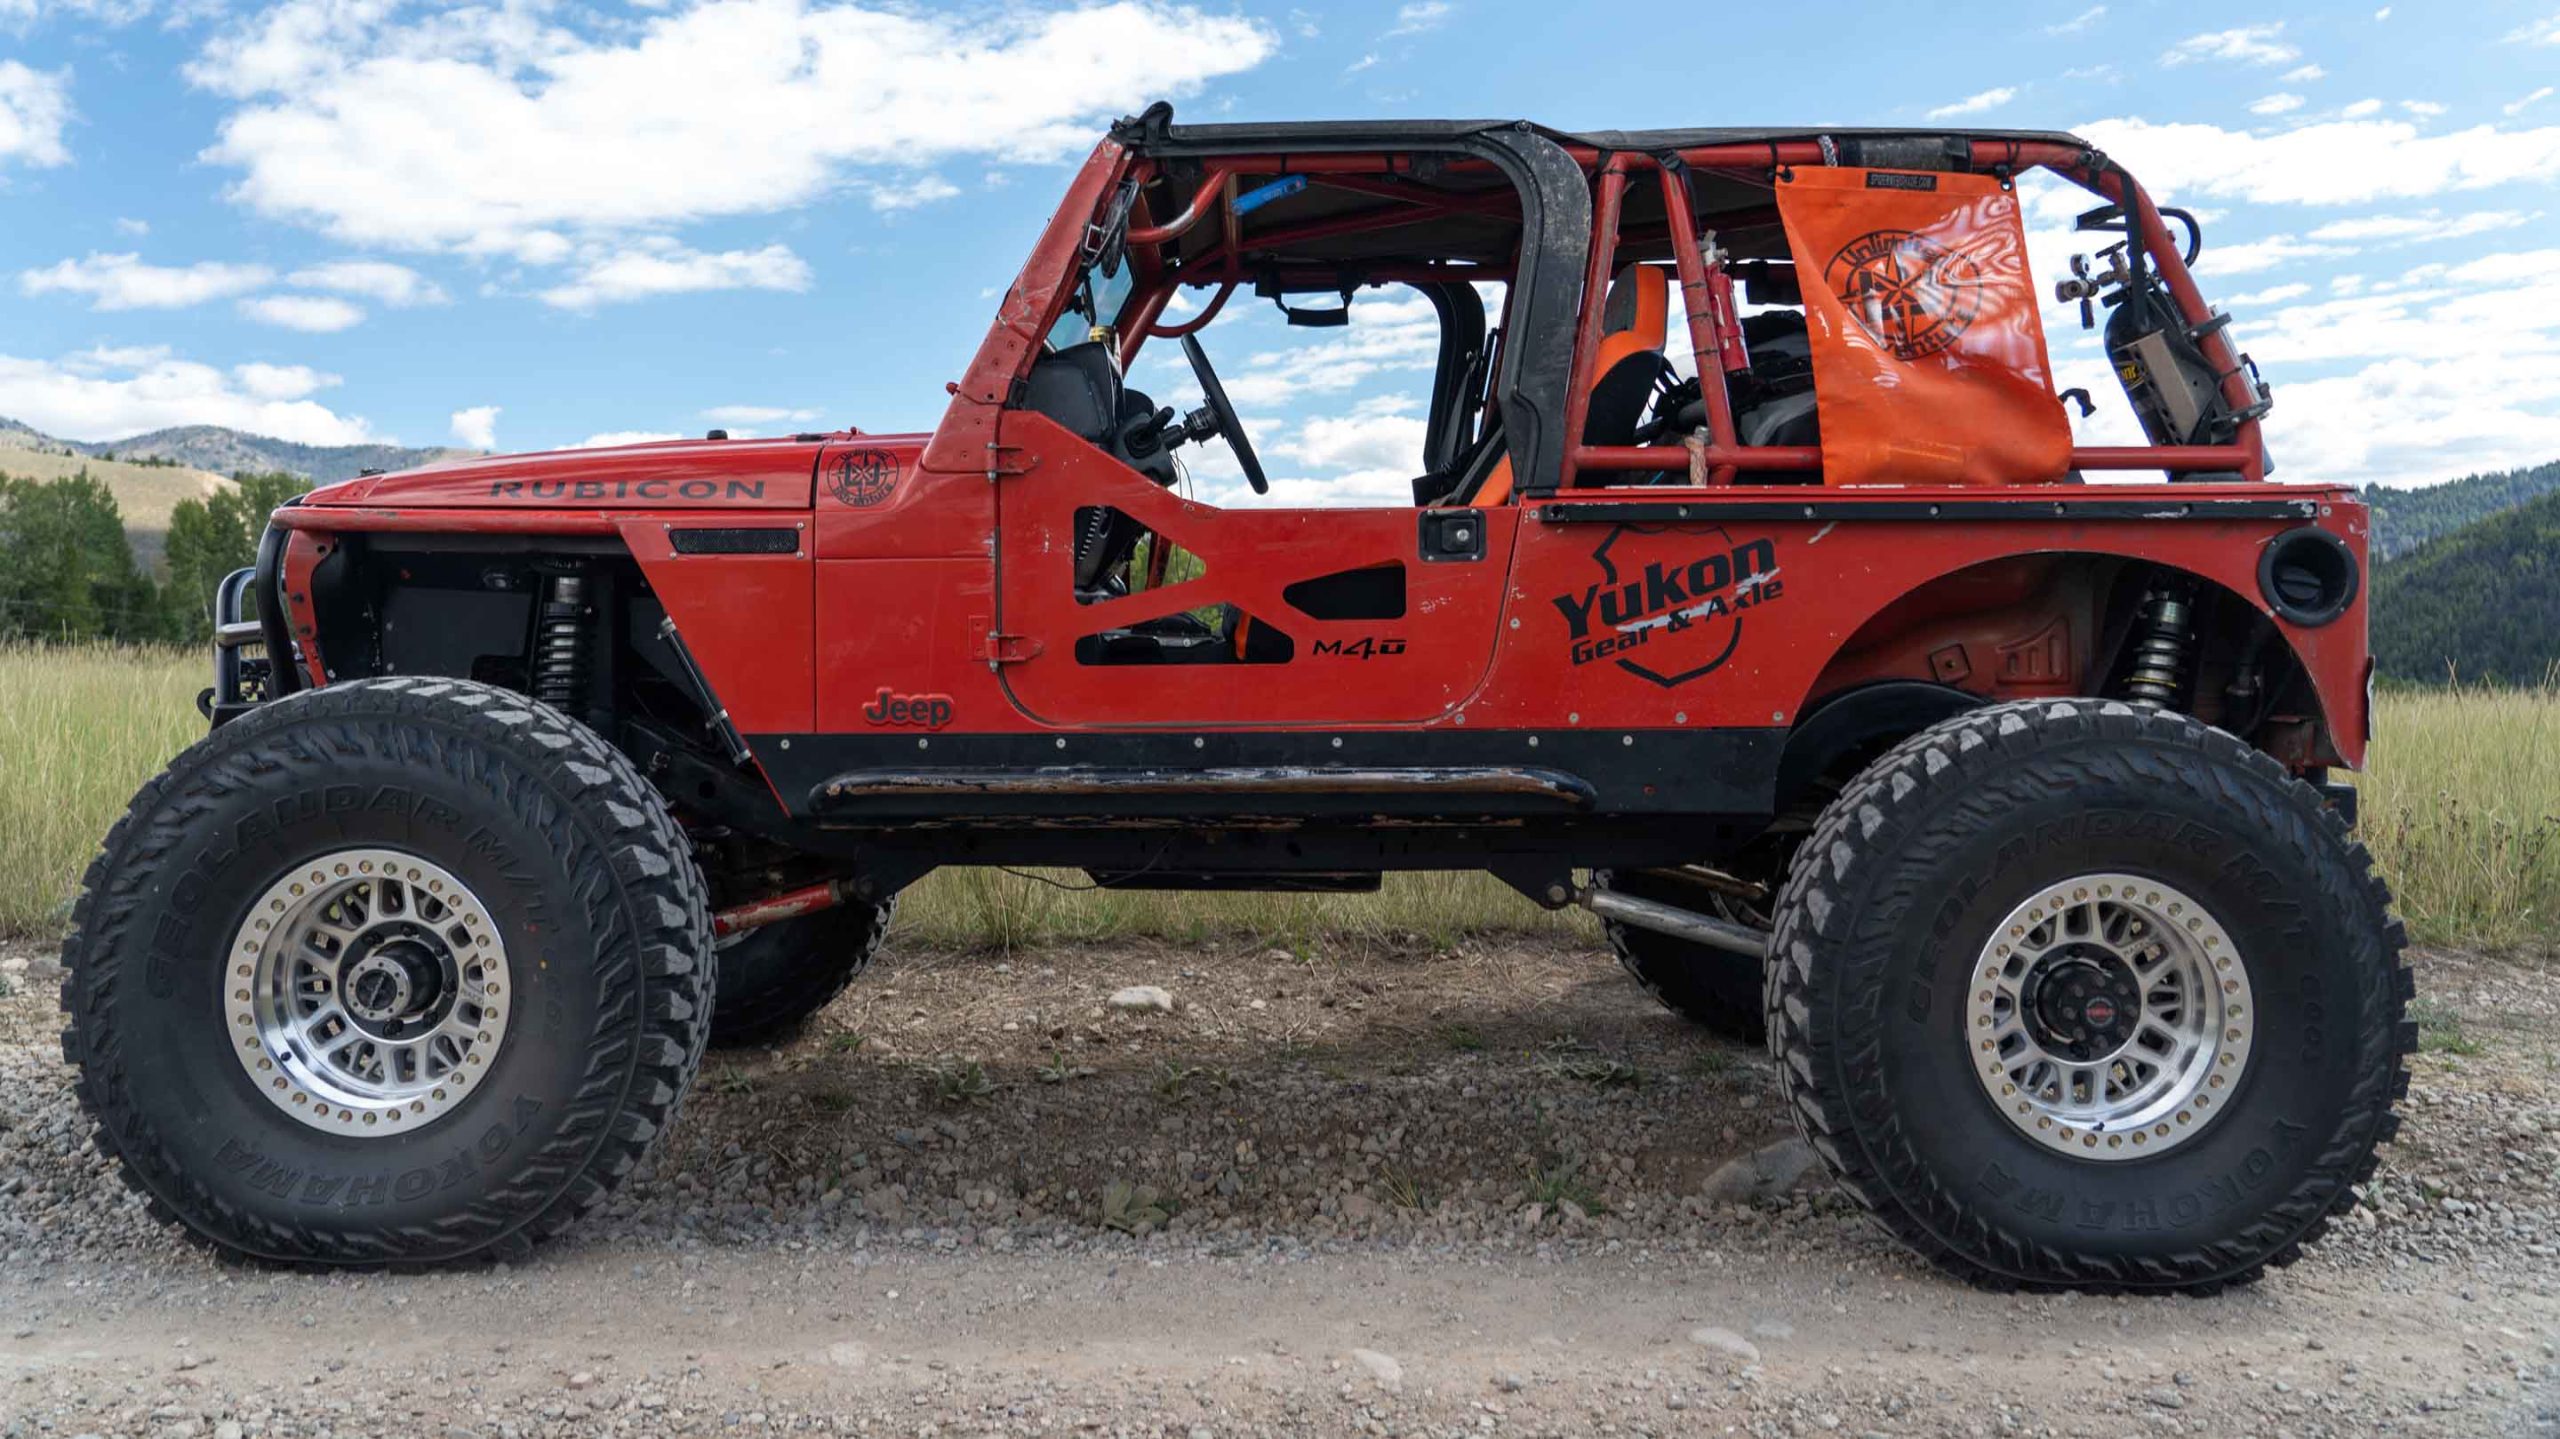
My history with Raceline Wheels started in the late 2000s. I had gotten into more rock crawling and was looking into new wheels for my Jeep, RidinLJ. The stock 16s weren’t cutting it anymore, and the more I went rock crawling, the more I knew I wanted beadlock wheels. This is an argument you will see online all the time. Do you really need beadlock wheels? Personally, yes, yes you do. I can’t remember when I installed them, it would have been late 2009 or early 2010, but man, I was blown away by the added traction I got from my tires.
When I bought my first set, I purchased 15x8s. At the time, I could only fit 35in tires and wasn’t planning on going any bigger. I was a single man living in Buena Vista, and the budget was tight. Spending money on four wheels and tires took up a chunk of my funds at the time. But I knew I would never wheel again without them once I had them.
One of the arguments you will see online about why not to buy beadlocks is the fact that they are not DOT approved. The other is that all beadlocks leak air. The first argument is legit; most of them are not DOT-approved. But this doesn’t mean you can’t drive them on the road. Most people have zero idea what a beadlock wheel even is. So this will be up to your own discretion. (Revkit does not condone breaking the law). I personally will drive mine on the road without a thought and have done so for 13+ years. The other big argument is the air leaking. This is not an issue when it comes to high-quality wheels like Raceline. Back in the day, there were tons of DIY beadlocks, and you could turn any wheel into one with these kits. Most of the air issues go back to those. A tiny pinhole can cause a slow leak if you don’t have a perfect weld.
After running the 15s for a few years, I realized I would be going bigger than the 35s. That really is the downfall of the 15in wheel. There aren’t that many tire sizes to choose from. When I decided to step up to 37s, I called my favorite wheel company and purchased a set of 17s. If I remember correctly, they did not offer the same backspacing as they did for the 15s. So, I ordered a set with a different bolt pattern, thinking of the future. I went with a 5×5.5 vs. the stock TJ/LJ size of 5×4.5, knowing that I could get axles made in that bolt pattern. I ran that size using spacers for roughly six years until I upgraded axles.
I had initially planned to keep the 5×5.5 bolt pattern, but when I upgraded to axles, I went ahead and went with an 8-lug axle. This was the first time I had truly considered using a wheel other than Raceline. By 2018, many new brands were hitting the market, and more brands offered beadlocks than ever before. But after looking at them all, I still returned to my old reliable, the Raceline Monster beadlock, just this time in an 8×6.5 bolt pattern.
About a year or so later, I really found out why I like the Raceline more than other brands. My dad had a 2017 Jeep JK with a different company’s beadlocks on them, and I was going to install a new set of Yokohama tires for him. Holy hell, I hated those things. I almost quit and told him he was getting different wheels. But my brother had them custom painted to match my dad’s Jeep, so I knew that wasn’t an option. The reason I hated them so much was due to how they attached the outer ring.
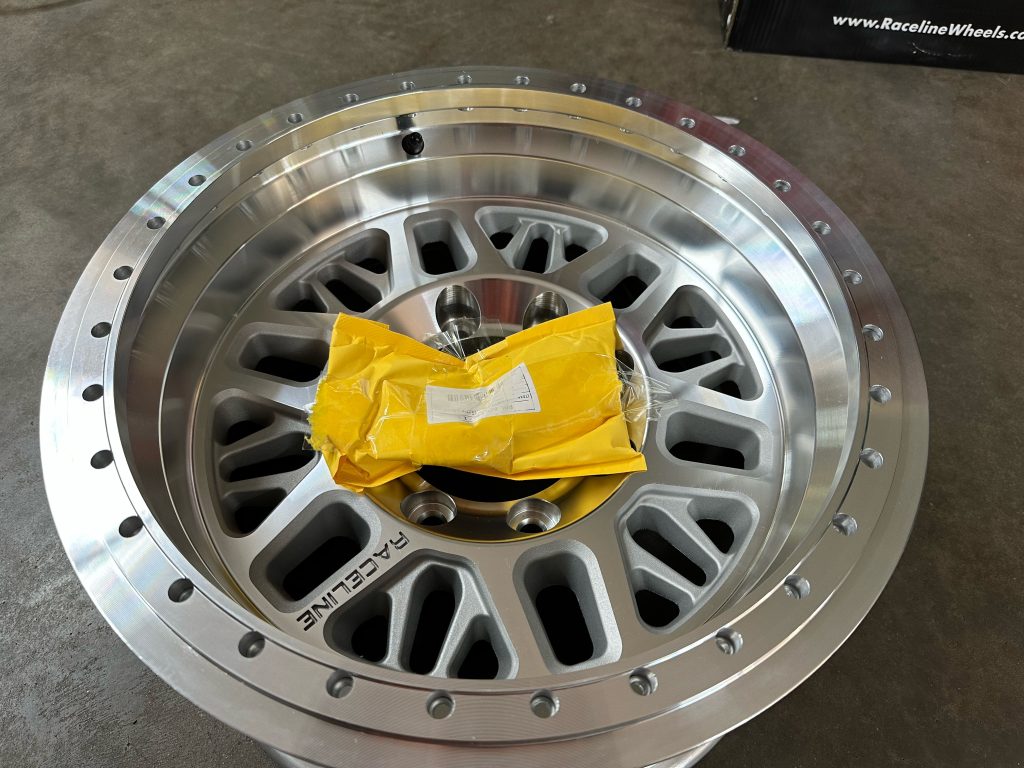
Your most common type of beadlock wheel found today uses a ring around the outside of the wheel that will clamp down on the bead. Most will use 24-32 bolts securing the outer beadlock ring. What I hated about these wheels were the bolts and how they attached to the wheels. Raceline uses a through design with an insert that attaches to the wheel. Nothing is threaded in the wheel itself, and if you break a bolt, you have to knock out the insert and put a new one back in. Raceline gives two extra inserts with each wheel. This company threads the wheel and then installs a helicoil into the threaded part; that is how the bolt attaches the ring to the wheel. I was having issues with the heli-coils coming out with the bolt and then having to get those removed and reinstalled into the wheel. I will tell you right now, it was not fun dealing with this, and I was getting frustrated.
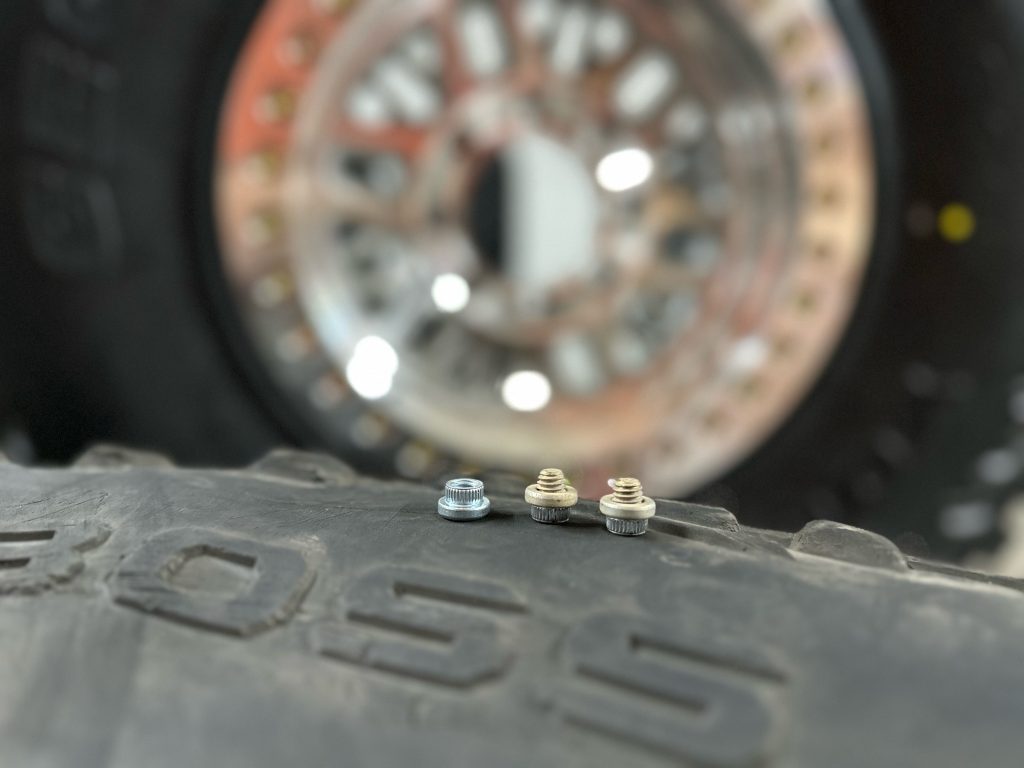
What I love about the inserts in the Racelines, you can fix a broken bolt or insert on the trail. If you break a bolt, all you need to do is pop out the insert, get a new bolt, and bam, you are fixed. With some other manufacturers, it’s more complicated; you will have to remove the ring altogether to resolve the issue.
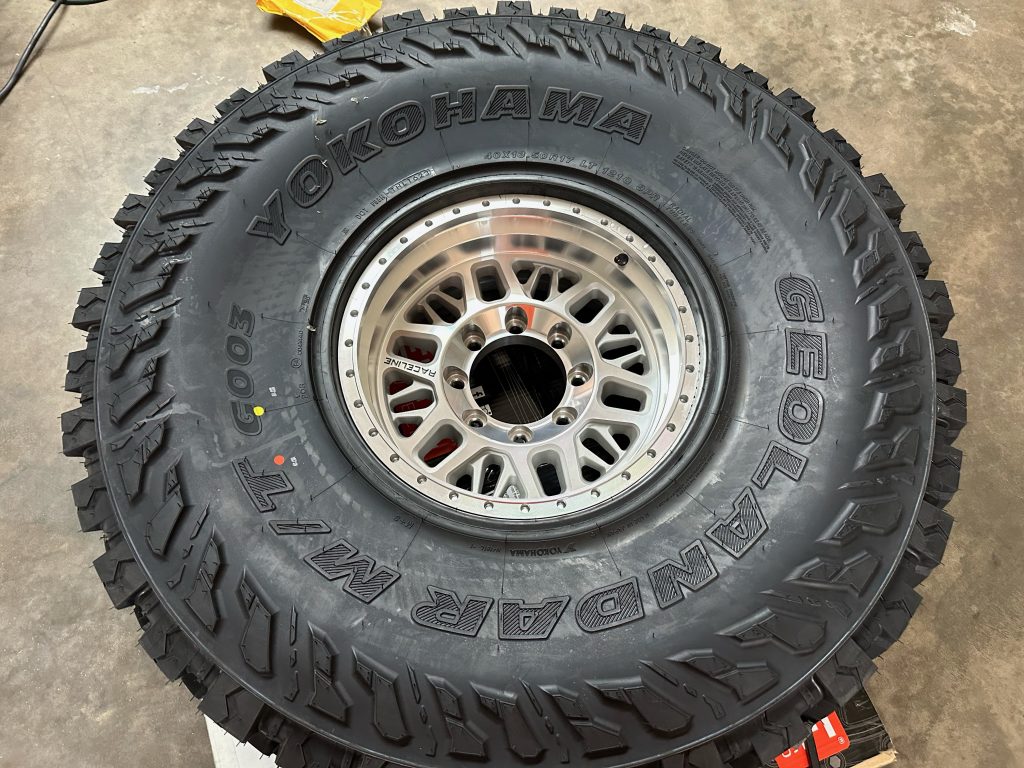
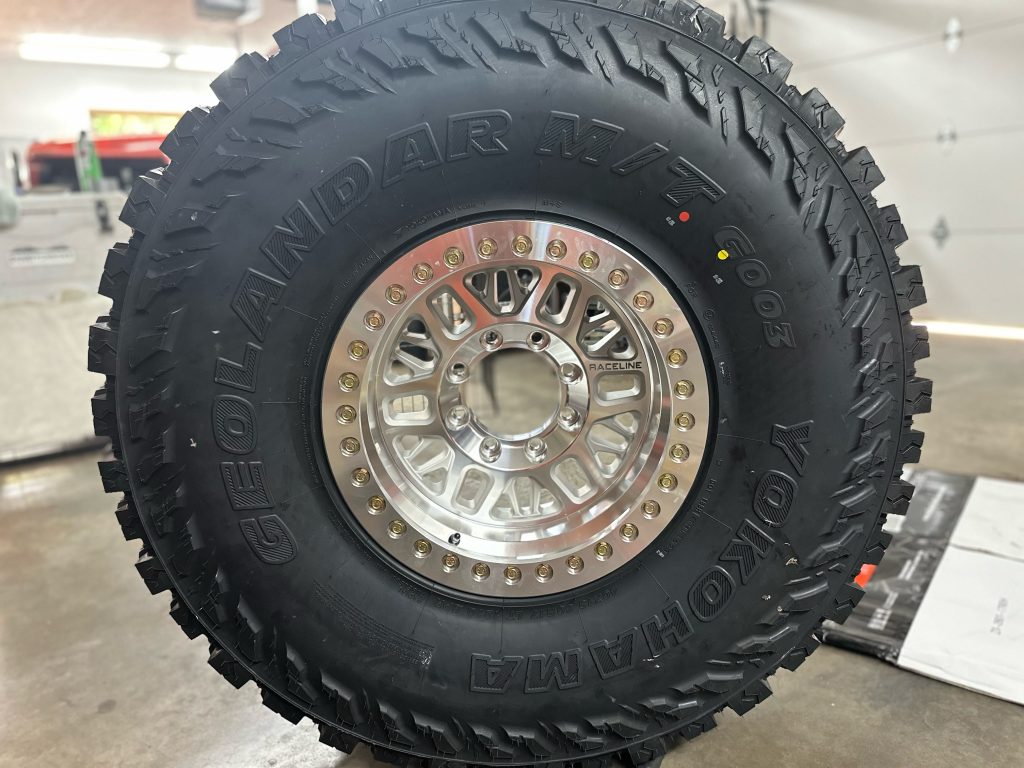
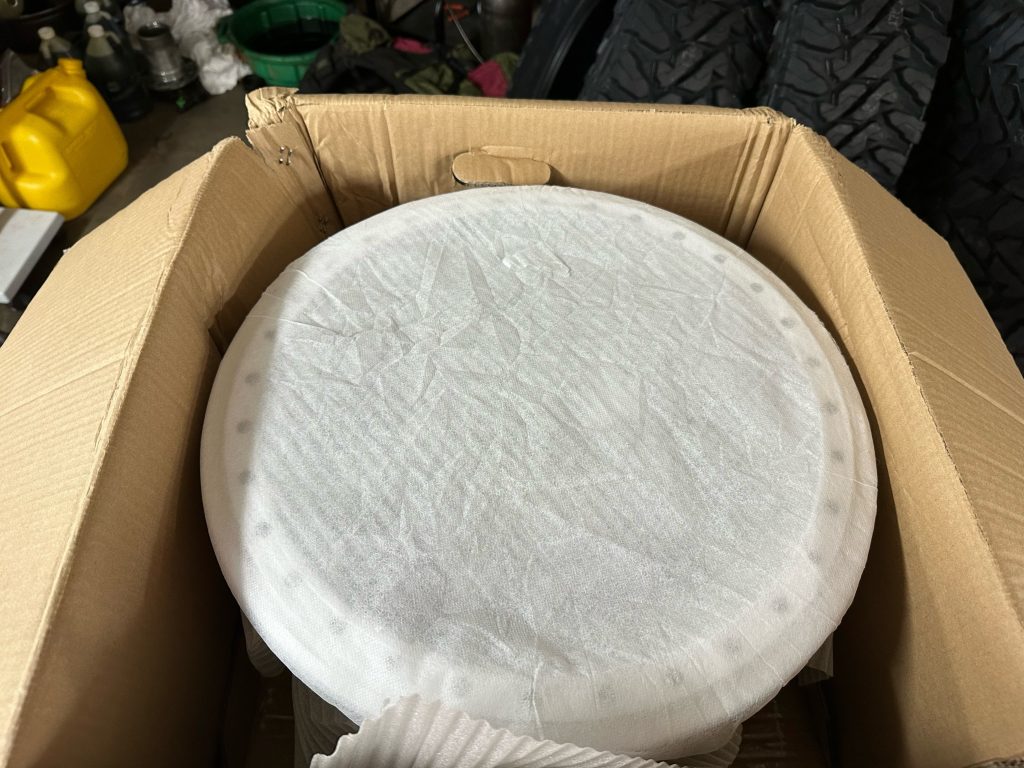
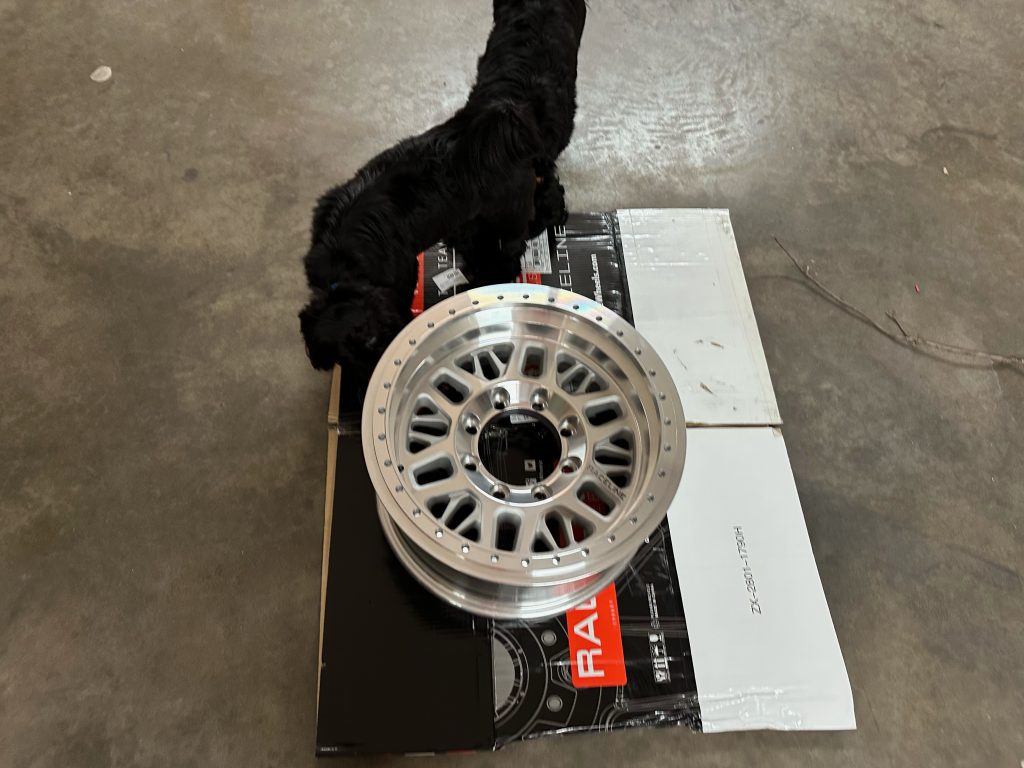
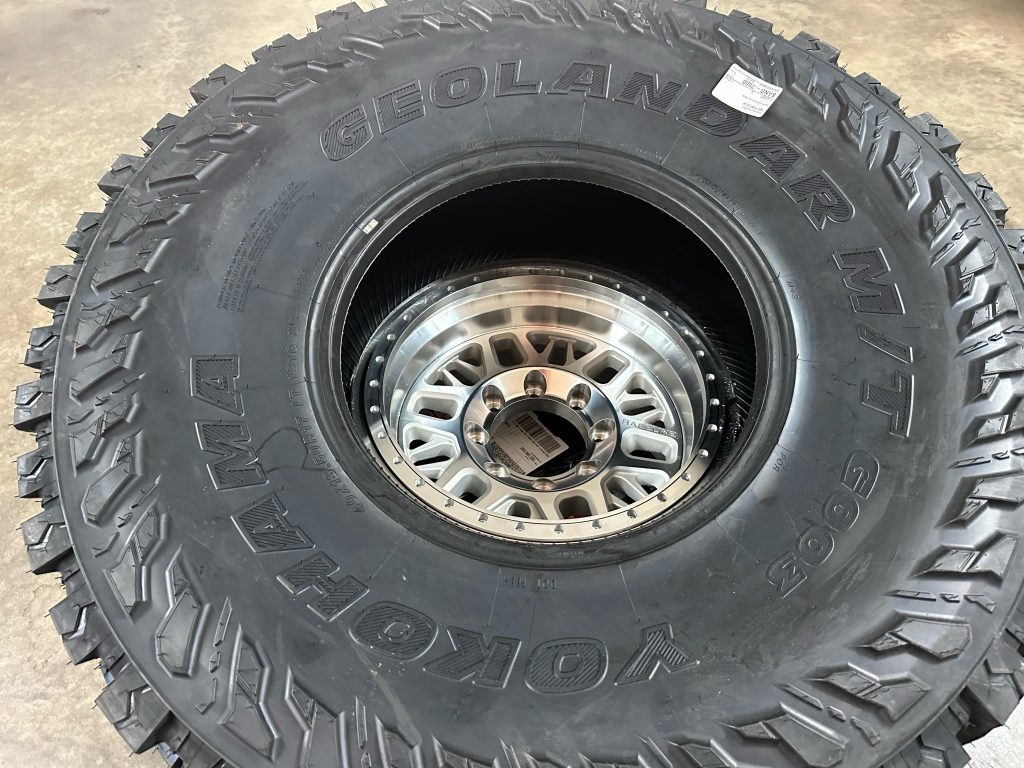
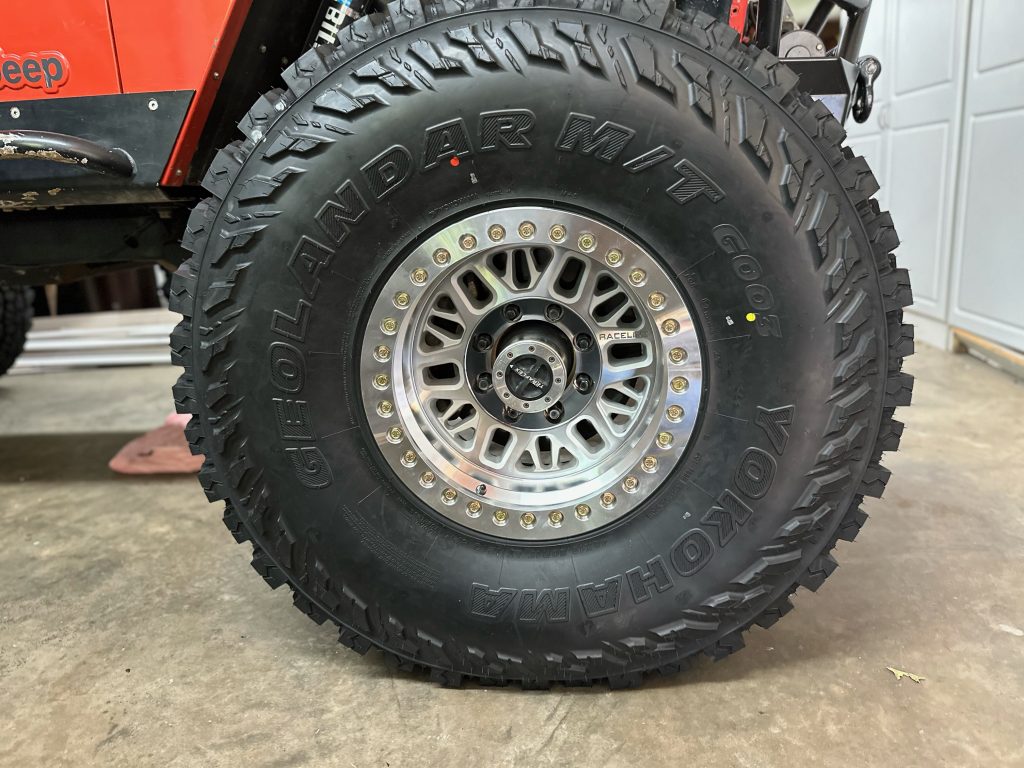
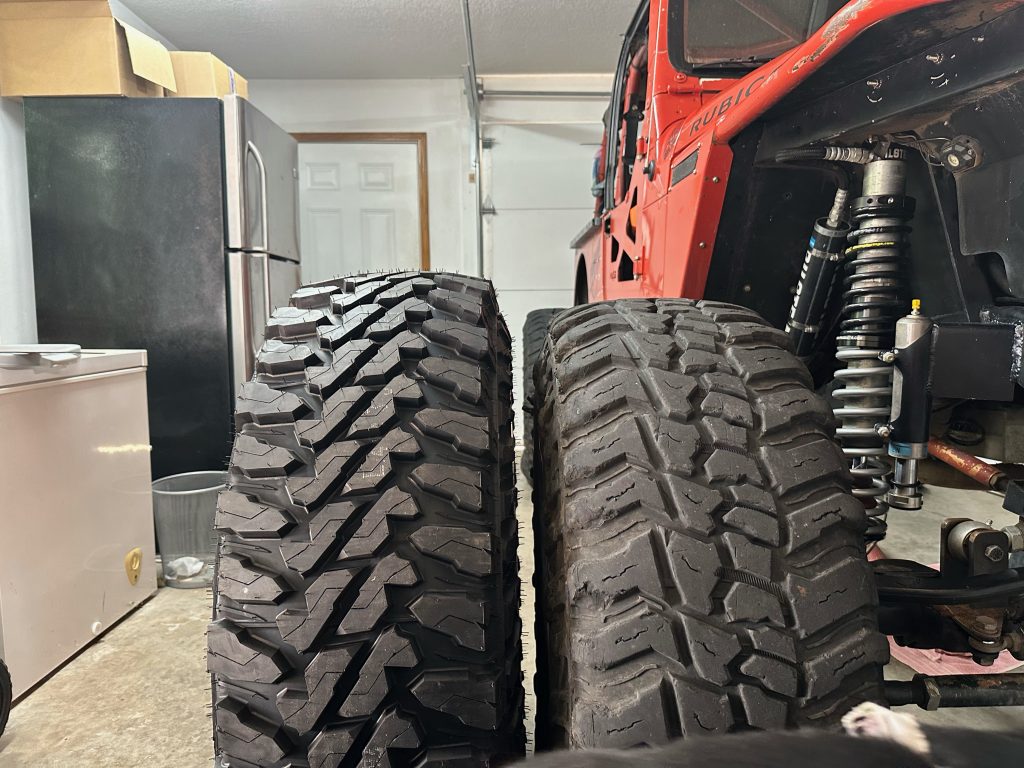
Now that we are all caught up on some history, I needed new tires, and Raceline had released a new beadlock wheel within the last couple of years called the Ryno beadlock. I loved it and knew I had to have a set when I put on new tires. So when it was time for new tires, I ordered a set of the Raceline Ryno’s and a set of Yokohama Geolander M/T G003 tires in the 40×13.50R17 flavor. Everything came within a few days; now it was time for the sweat log “called the garage” to get these mounted up.
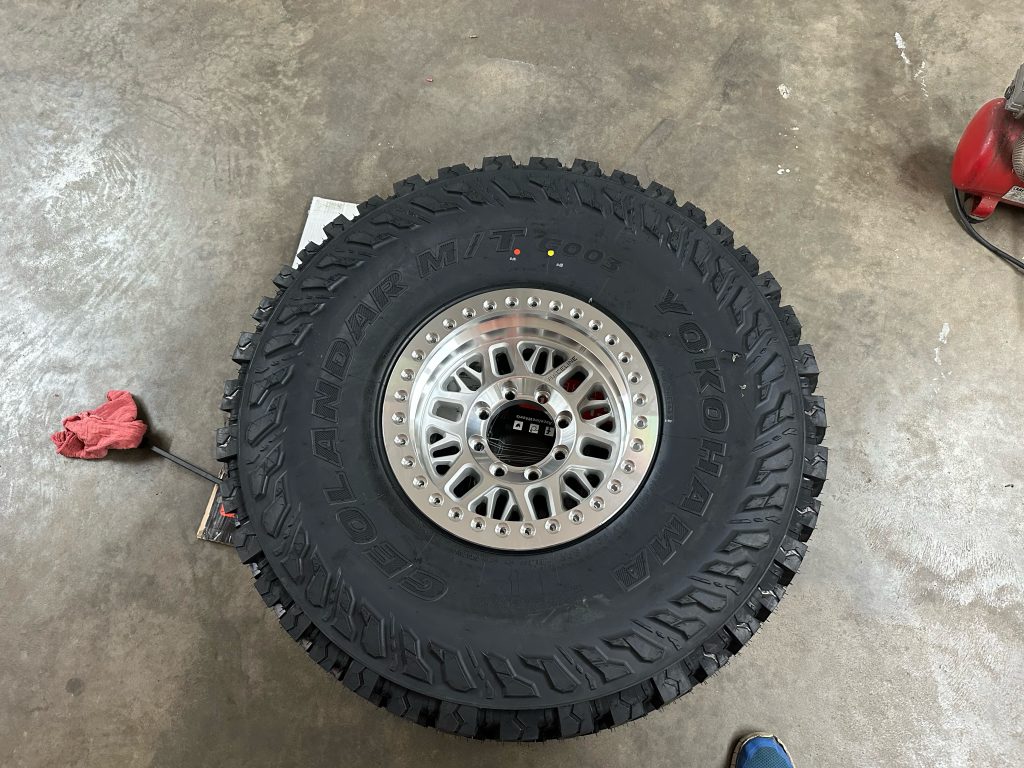
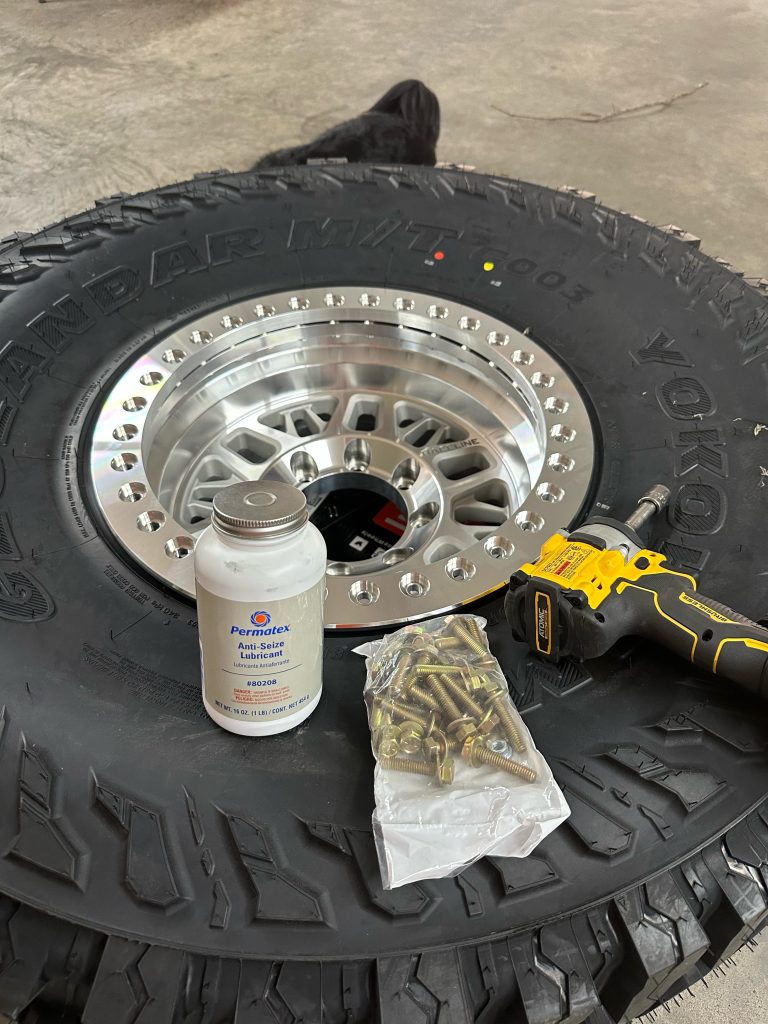
One thing I have always loved about beadlock wheels, you can mount your tires from home without sending them to a tire shop. The first step was to tear apart a box and put it on the concrete. I use this to put the wheels on to prevent scratching as I try and mount the tire. What makes it easier to mount at home is that you only have to get one bead around the wheel, unlike a conventional wheel and tire setup. I had a water bottle with soap from another project, so I used it to stray the bead that was going around the wheel to help get it to slip over. After a bit of bouncing on the tire, it finally slips over, and now it’s time to attach the ring.
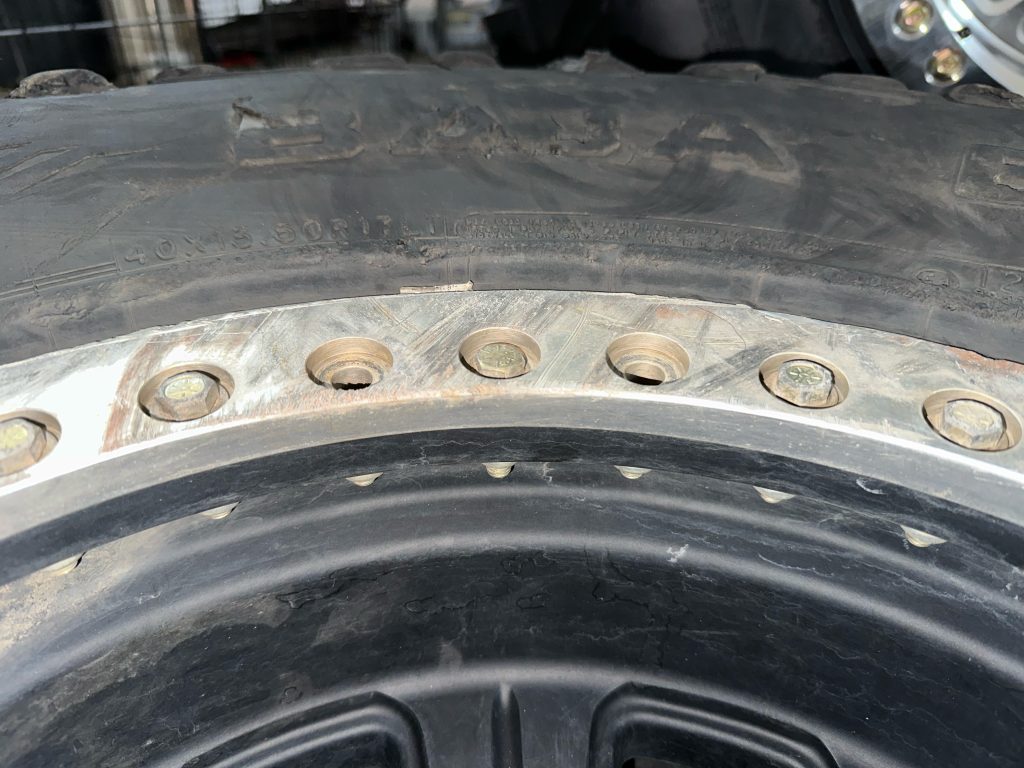
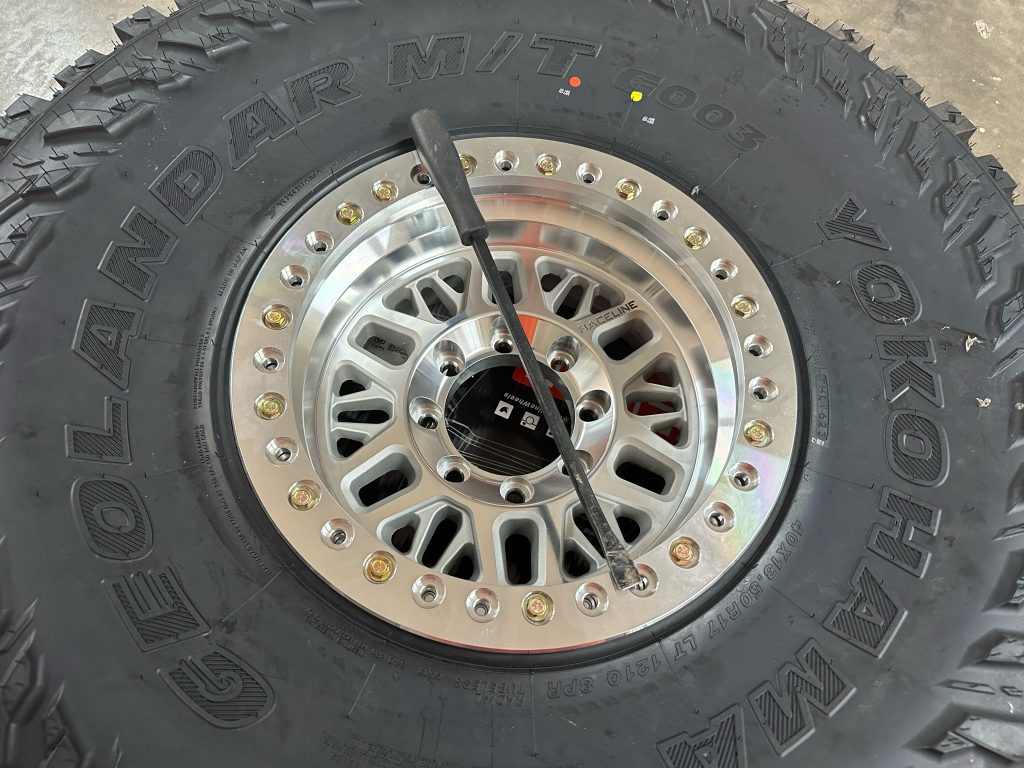
Add anti-seize to each bolt once you are ready to attach the beadlock ring. It only takes a little, but it is an excellent insurance to add. Anytime you put a steel bolt into an aluminum piece, you should always use some anti-seize. Once I have the first bolt started, I get a bolt started on the opposite side. This can be tricky, but I push down on the tire’s sidewall while pushing down on the ring until I can get the bolt started. Now that I have one started from each side, I get every other bolt started until I get every bolt started. You are not supposed to use any impact, but I like to, as it’s faster. But I did make sure I turned it down to the lowest setting and went slowly around the wheel. I also used a pry bar to keep track of where I was. It’s always wise to go across and back and forth vs. going around the wheel. This will create a more even attachment with the bolts. Once you have them snug, torque them to 16-18 ft-lbs using the cross pattern.
Now that the first one is done, time for the rest. As of writing this, I only had four, and the spare wheel had yet to come. They only had 4 in stock when I ordered, and the 5th should be here in a week or so. One thing I noticed that some people might not like, the wheels do not come with center caps. This is noted on the website, but knowing people don’t always read this can cause people to be annoyed, but I am glad they don’t. They wouldn’t work in my case, and then I would have these center caps with nowhere to put them.
One thing we have yet to talk about that is important when choosing wheels is the backspacing. There are two ways to measure where the mounting point on the wheel is, backspacing and offset. We off-roaders like to use backspacing more, but most people use the offset measurement when it comes to trucks or passenger wheels. But what do these mean? In basic terms, backspacing is the distance between where the wheel attaches and the inner lip of the wheel. Offset is the distance between the center of the wheel and where the wheel clamps. That is why you will see either a positive or negative offset. For a quick comparison, my Raceline Monster wheels were 17×9.5 with a 4in backspacing and -32 offset, whereas my Raceline Ryno wheels are 17×9 with a 3.5in backspacing and -38 offset. The numbers you see with offset are in millimeters. I hope that helps vs. making it even more confusing.
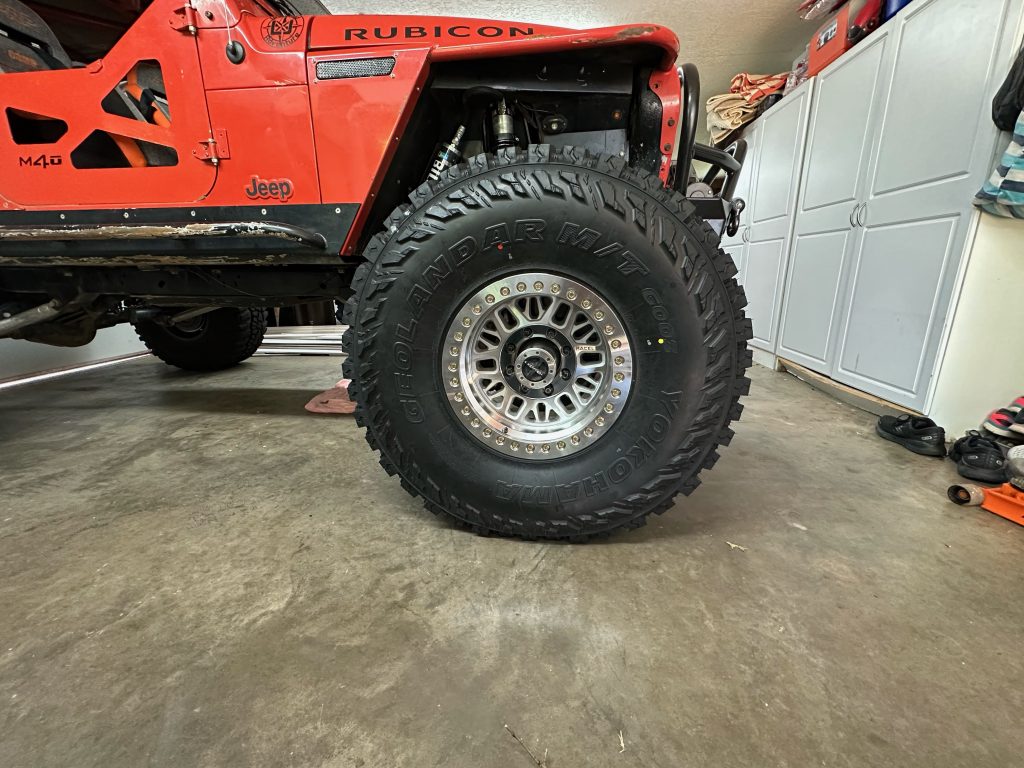
Now that I had all the wheels and tires installed, it was time to install them on the Jeep. One thing you should do before installing tires on your wheels is to test-fit the wheels to make sure they work on your vehicle. It’s rare, but sometimes stuff can get labeled wrong, and you want to ensure the wheel will fit properly. I love the details of the Ryno wheel and can’t wait to take them out on the trail.